DM’s Corner • Props & Immersion
How to Make Simple RPG Character Tokens for Your D&D Game
Upgrade your table without emptying your coin purse.

Not every adventuring party has a treasure hoard to throw at premium minis — and truth be told, you don’t need them to run a great game. When I first started DMing with my son, our “minis” were board-game pawns and pocket change. The stories were still magic.
You can make great-looking tokens in an afternoon. Cheap, quick, and table-ready.
Tales & Tankards
Here’s a fast, budget-friendly method to create tokens for characters, monsters, and NPCs using everyday supplies — and a bit of creativity.
Quick Stats
- Total time: 1–2 hours for a full set
- Estimated cost: $10–$20 (depending on what you already have)
- Grid size: 1″ round works for most battle maps
What You’ll Need
- Metal washers (¾”–1″ diameter)
- 1″ round labels or sticker sheets (e.g., Avery 5408)
- Printed character art (portraits, icons, or silhouettes)
- Scissors or a 1″ circle punch
- Glue stick / adhesive spray (if using plain paper)
- Optional: Mod Podge or clear tape for sealing
Step-by-Step: Crafting Your Tokens
1) Choose and Print Your Art
Pick portraits for PCs, monsters, and NPCs. Use token packs, public-domain silhouettes, or your own illustrations. Print at ~1″ diameter (test on scrap paper first).
Pro Tip: Print a border ring around each circle (ally/enemy/summon colors) to make them easy to sort at the table.
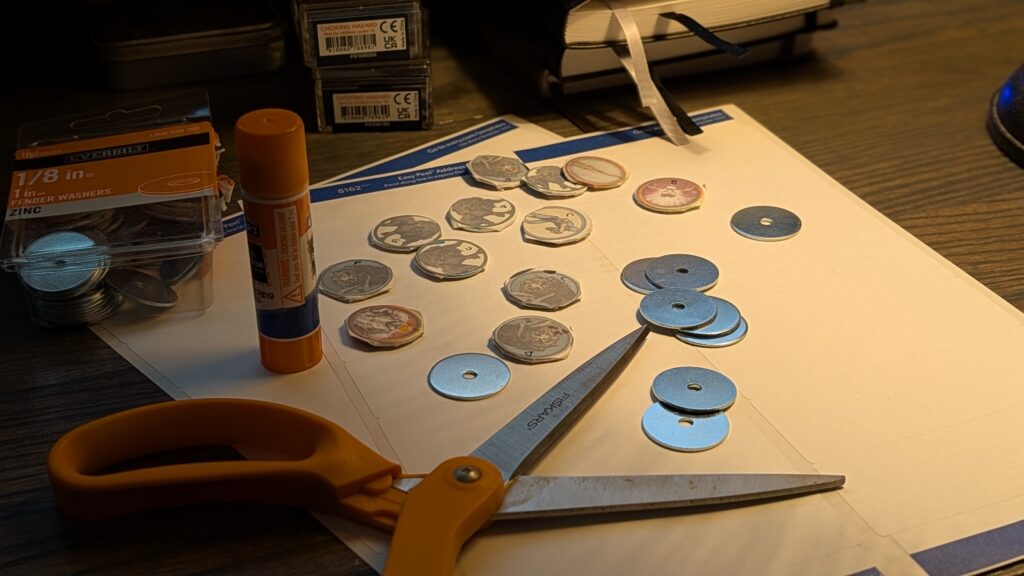
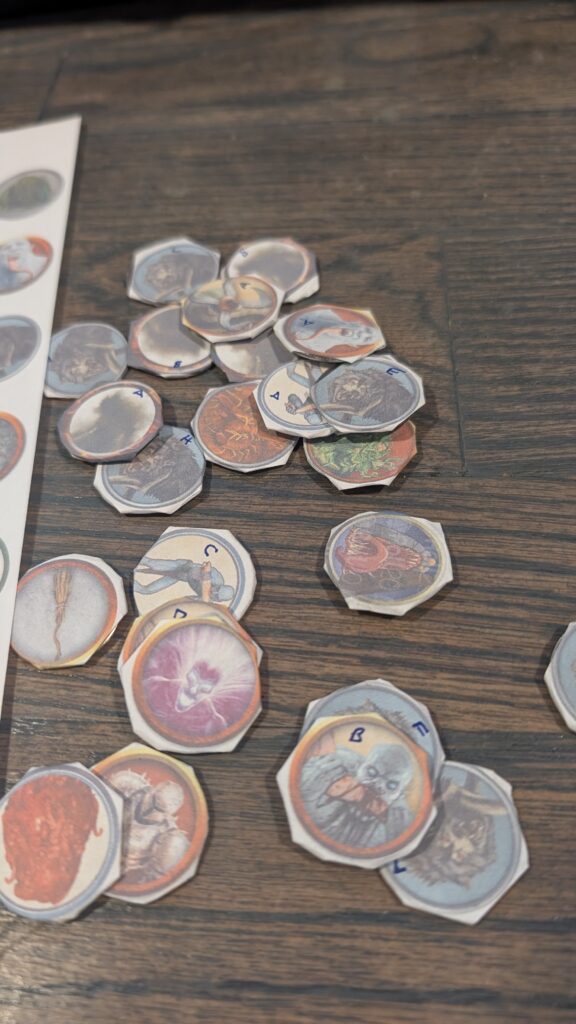
2) Cut and Stick
Use a 1″ punch or scissors for clean circles. Stick each portrait to a washer. If you’re using plain paper, apply a thin, even layer of glue before pressing onto the metal.
The weight of the washer feels great — tokens stay put on the grid and stack neatly between sessions.
Tales & Tankards
3) Seal for Durability (Optional)
Brush on a thin coat of Mod Podge, use laminate dots, or cover with clear packing tape and trim flush. This keeps edges from fraying after a few dungeon crawls.
Raise a glass to simple solutions — and to the adventures they spark.
-Tales & Tankards
Why This Method Works
- Cheap: A handful of washers costs less than one premium mini.
- Fast: Craft a whole party before the pizza arrives.
- Customizable: Swap art any time a character changes look or class.
- Durable: The weight feels good and resists table bumps.
Bonus Tips from the Tavern
- Double-sided: Portrait front, class icon or condition on the back.
- Color code: Green = allies, Red = enemies, Blue = summons.
- Status rings: Make thin rings from cardstock to slip over tokens.
- Storage: Altoids-style mint tins = portable and stackable.
Want more Homebrew DIY? Check out our other quick builds and table tools in the Homebrew Vault. Got a token trick of your own? Drop it in the comments — we love learning from the community.